This post may include affiliate links. We do earn a commission for products purchased using these links (at no additional cost to you). Thank you for supporting Swing Yard, making the content you see on this blog possible. For more information, please see our privacy policy for details.
*Read our review guidelines.
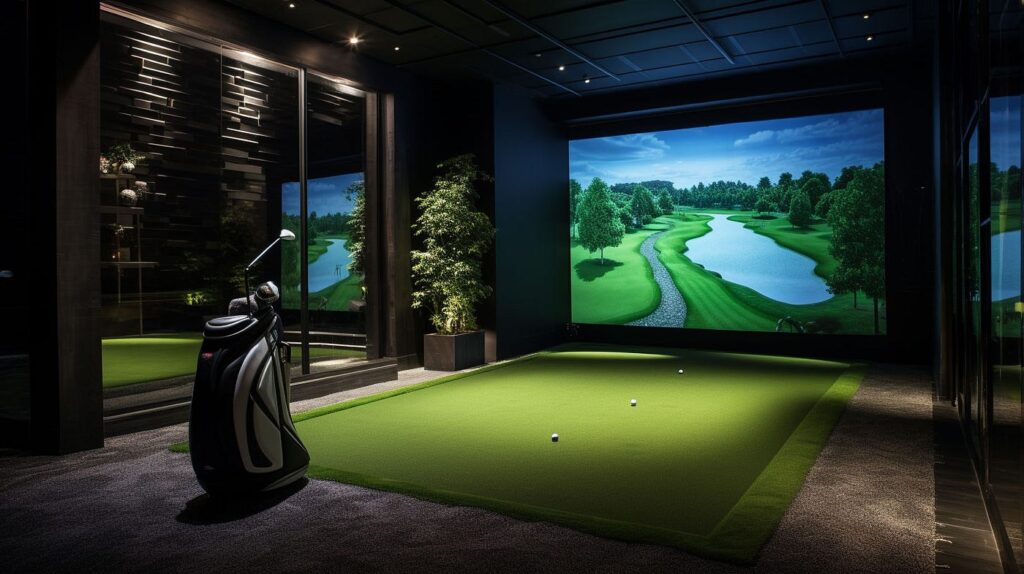
Simulator Considerations
When first considering whether you can put a golf simulator in your home, there are so many questions to answer. Do I build it myself? Should I buy a pre-made Simulator Package? Or do I pay someone to install it for me? How much do they cost? How much space do I need? One thing common amongst many simulator owners is that they overpay for their setup because of the complexity of well understanding the necessary components. In this article we’ll break down each of the components and considerations that go into a golf simulator. While they are not all of equal importance, the more you understand the more likely you are to take on some or all of the project yourself. Typically, the more you take on the golf simulator project yourself, the more money you’ll save.
DIY Golf Simulator vs. Pre-Built Packages: Which Should You Choose?
Before diving into components, there’s one decision that shapes everything else: do you build your simulator piece by piece, or buy a pre-built package? Neither answer is wrong, but the right choice depends heavily on your budget, technical comfort level, your space and how much you value customization versus convenience. Let’s break it down:
| DIY Build | Pre-Built Package | |
|---|---|---|
| Cost | Lower (you save 20–40%) | Higher (bundled markup) |
| Customization | Full control over every component | Limited to what’s in the package and hard to make adjustments later |
| Setup Complexity | Moderate to high (depends how complex you make it!) | Low to moderate |
| Component Quality | You choose each piece. Spend up where necessary and save on certain items. | This can vary depending on the package you choose. For example, some packages cut corners on screen or projector |
| Upgrade Path | Easy – swap individual pieces anytime anywhere | Can be restrictive depending on package |
| Best for who? | Budget-conscious, research-willing golfers. Or those who love a good sweat equity project. | Golfers who want a plug-and-play experience and/or not the DIY type |
| Time Investment | Several hours of research + setup | Minimal research, faster setup |
Choose DIY if you’re willing to spend a few hours researching components, you have a specific budget you’re trying to hit, or you already know you want a particular launch monitor that isn’t offered in pre-built packages. The savings are real and building your own setup typically runs 20–40% less than buying a comparable pre-built package, because you’re not paying a retailer to bundle and market the combination for you.
Choose a pre-built package if you want to make one purchasing decision and be done with it, you’re not confident matching components together, or you’re buying as a gift and need something that arrives ready to set up. Pre-built packages from reputable retailers like Rain or Shine Golf and Shop Indoor Golf have improved significantly and represent solid value at the $5,000–$10,000 range, particularly for first-time buyers.
The most common mistake with DIY builds is mismatching components like pairing a projector with a throw ratio that doesn’t fit the room depth, or buying an enclosure that doesn’t accommodate the launch monitor’s required mounting position. This guide walks through each component in detail below specifically to help you avoid those pitfalls.
What are the components of a golf simulator?
It’s important to understand the components of the golf simulator before attempting to piece a simulator together in your home. Understanding the components is critical, given the normal constraints of budget and space, to optimize your golf simulator build. Let’s review in quick fashion what the components of the simulator are and we’ll delve into them in greater detail down below.
Golf Simulator Components
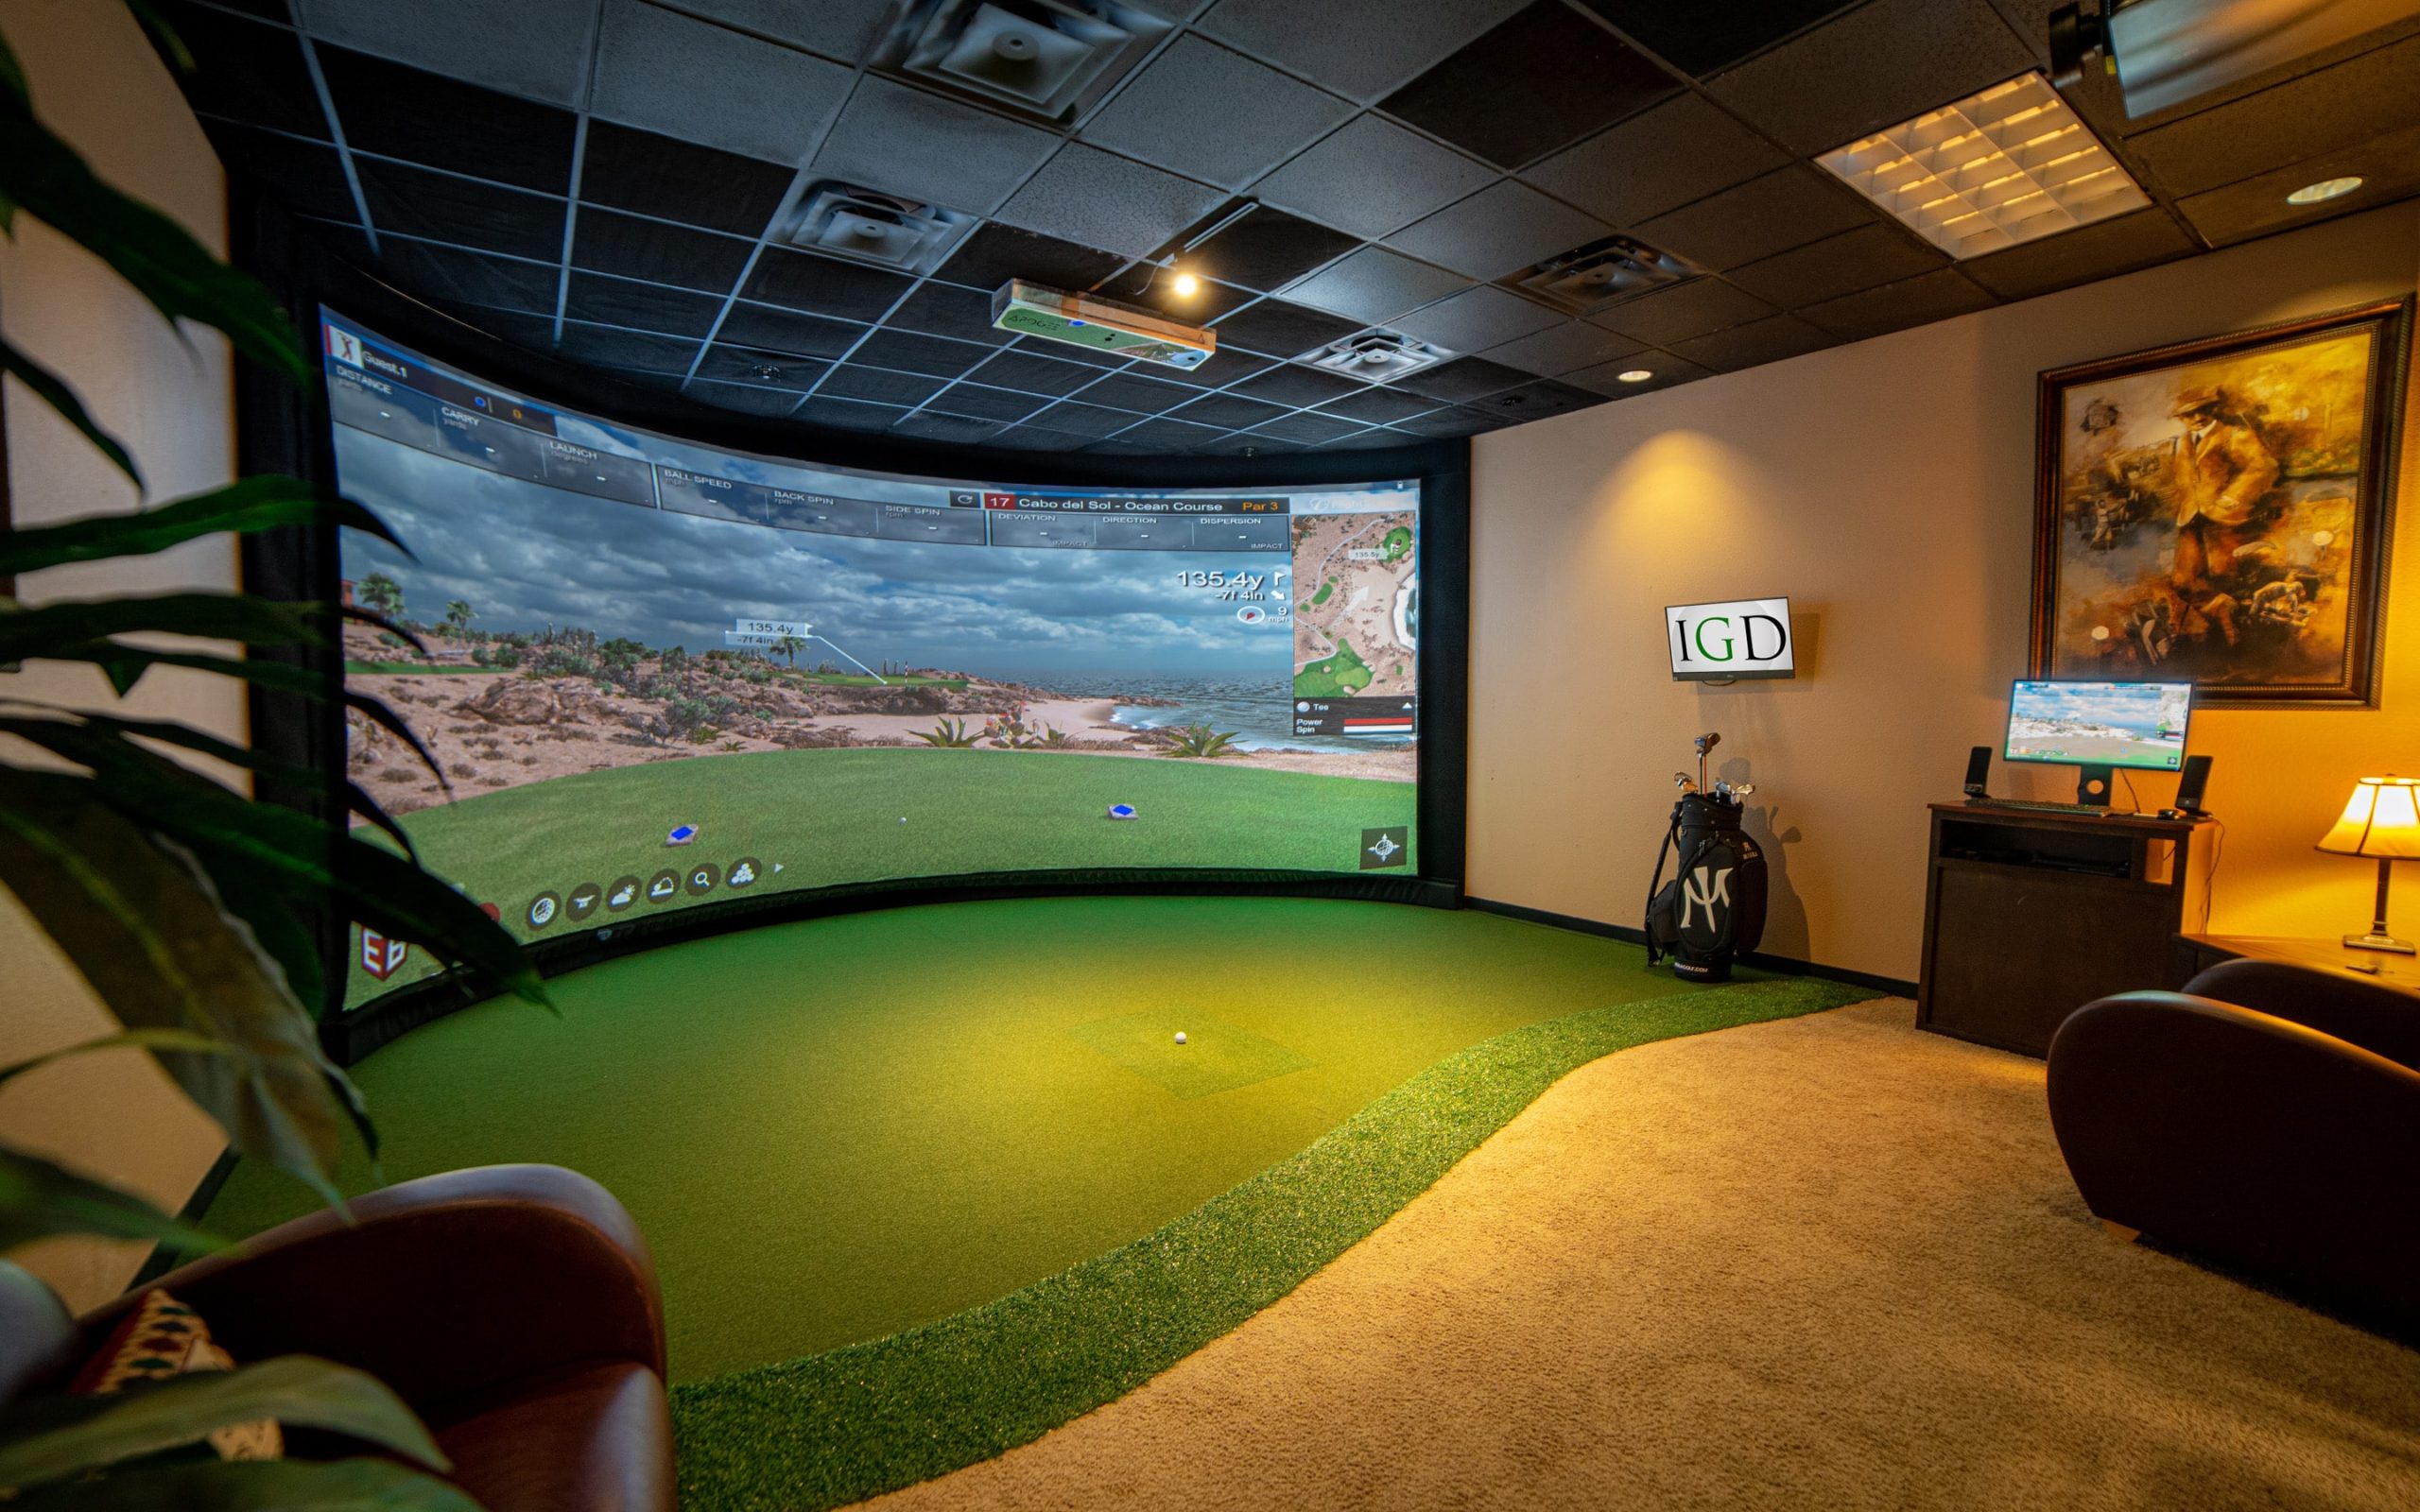
- Launch Monitor – The most critical piece to your golf simulator experience. A launch monitor typically sits overhead or on the floor alongside the ball and picks up ball and club movement, sending that data to a computer or piece of golf simulation software.
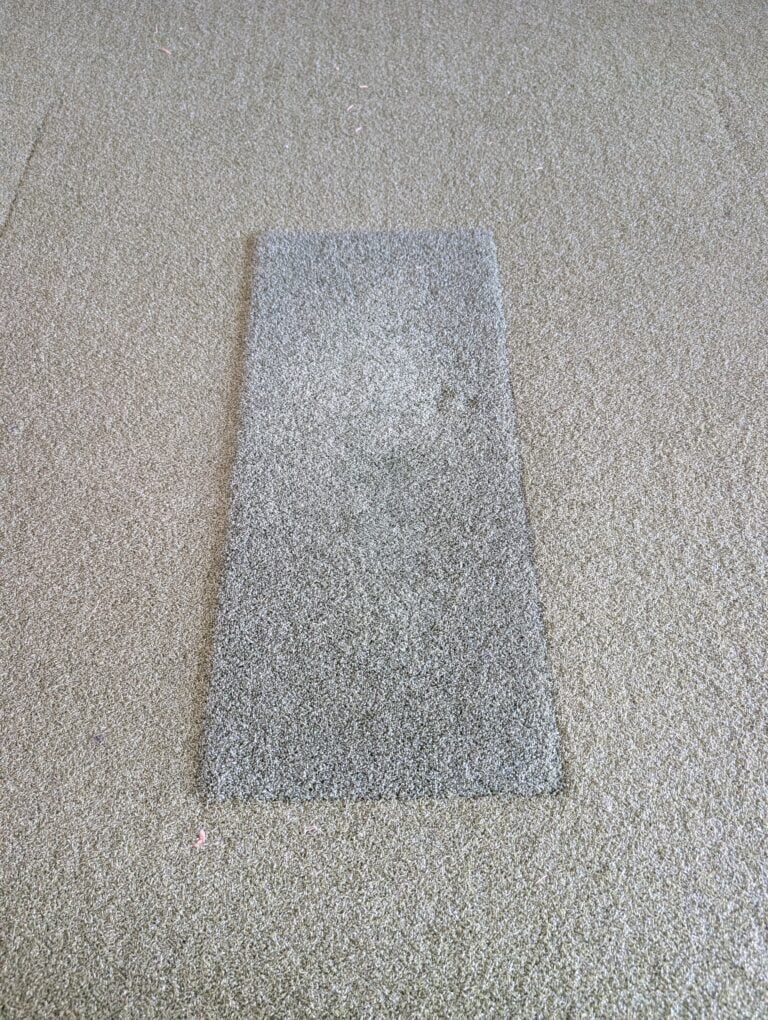
- Hitting Mat / Stance Mat – You need some sort of mat to stand on that closely replicates on-course conditions from which you hit the golf ball. This can be as big as a large piece of turf covering your whole simulator with golf holes for putting. Or, it can be as small as a little hitting strip like this or a premium option like the SIGPRO Softy or Bullseye 3D.
- Impact Screen – An impact screen is what is used to take the impact of all your golf shots. Further to that, and if you so choose, it will also serve as your projector screen to help give you the full golf simulator visualization experience.
- Projector – Presuming you are looking to cast an image on a screen, you’ll need to find a projector that suits your budget and sim space layout.
- Computer– Golf simulators require a computer (or iPad) of some sort for the launch monitor to connect. The launch monitor software and simulation software are installed on the computer where they interact and allow for an on course golf simulator experience.
- Enclosure – In addition to a screen, most people want something to cover the sides and top of their playing area. Not only does this make things more aesthetically pleasing, but it prevents sky’d drives from going through your ceiling and hoseled wedges from going through your wife’s mini-van window.
- Simulation Software – Your launch monitor simply captures ball speed and spin to estimate ball flight. That information needs to be passed to golf course simulation software in order to be able to have an on course experience. Sometimes this is incorporated into the launch monitor itself (like with Trackman or Uneekor).
- Miscellaneous Add-Ons – Like many things, the finishing touches to your golf simulator can be just as important as the big ticket items. The final piece of the puzzle are things like overhead lighting, balls, tees, etc… Let’s take a quick look at some of those items to help perfect your at home simulator!
Here’s a video that outlines all of these components to help you further understand everything to DIY!
How Much Does a Golf Simulator Cost?
One of the first questions I always get (and understandably so) from someone interested in building a simulator is “How much does a golf simulator cost?” The answer is of course nuanced, but I usually say between $5,000 and as much as you want to spend. A golf simulator can be as simple as a floor standing launch monitor, a hitting net and an ipad. If you’re looking for a high quality semi-realistic at home golf experience, you can do this yourself for between $7,500-$15,000 if you’re willing to do some work yourself. It goes without saying that the ceiling doesn’t end there, and if your budget allows, there’s many more options above that.
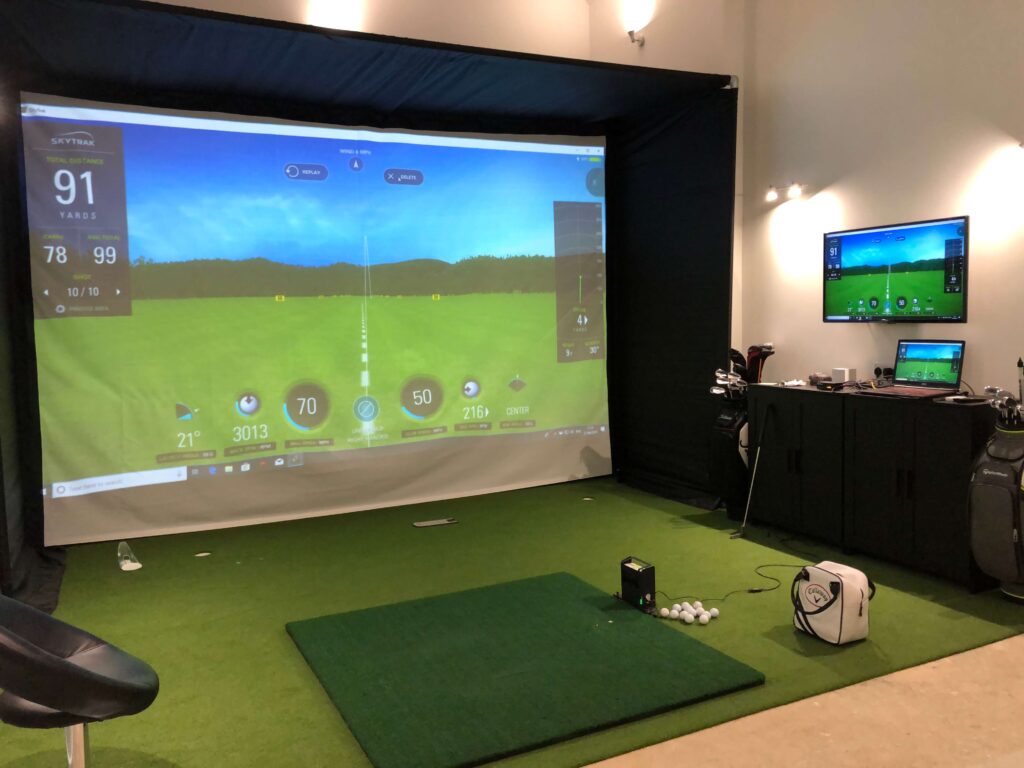
Launch Monitor
The launch monitor is the most important piece of any simulation setup. I’ve seen extremely expensive commercial setups with last generation technology that are less accurate than $10k in home golf simulators. As referenced above, the launch monitor is what reads ball speed and spin, and sometimes club information to estimate the ball’s flight. Golf launch monitors break down into three price tiers.

Launch Monitor Tiers
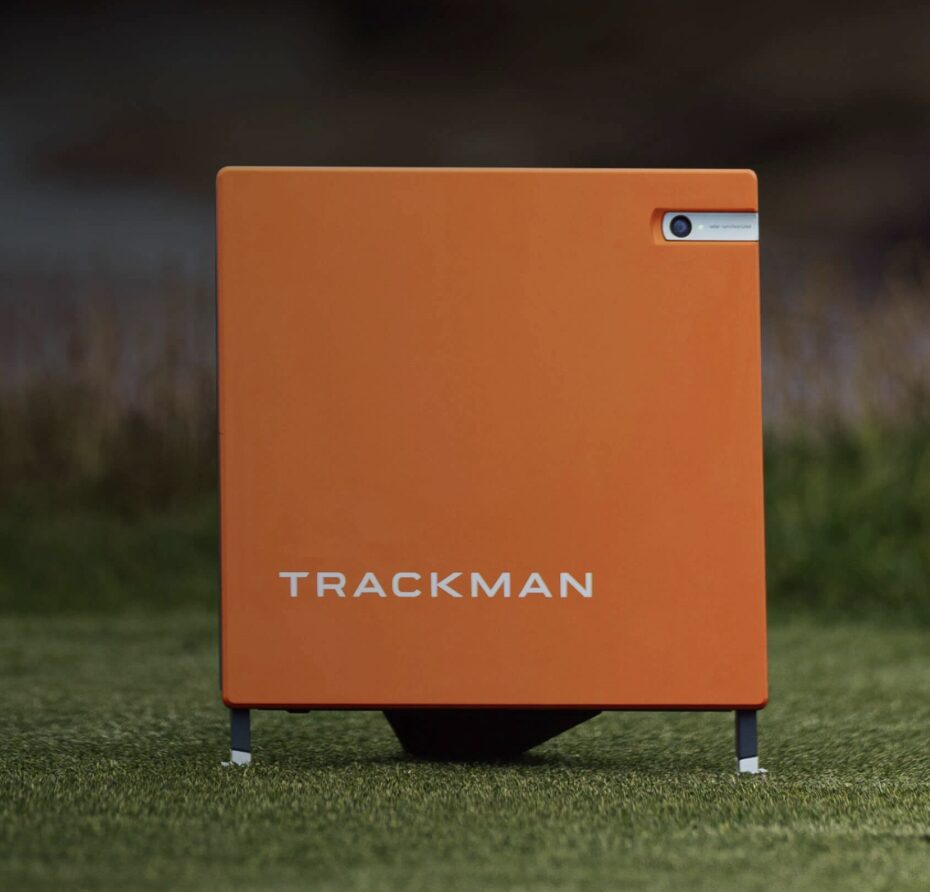
- High end launch monitors >$20,000 (Trackman 4 / Full Swing / HD Golf / Foresight GC Hawk). Full Swing and HD golf simulators are unique because they come as standalone packages. You may recognize Full Swing from the TGL league. Their packages can be $25,000-$150,000 and are almost always professionally installed. Trackman 4 and the Foresight GC Hawk are standalone launch monitors that can be used with the company’s own proprietary software or other available golf simulation software.
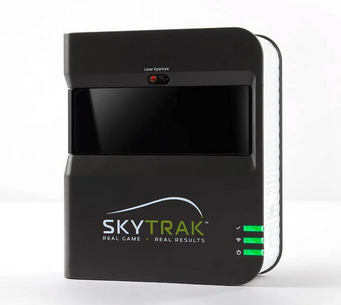
- Mid Range launch monitors – $5,000 – $15,000 (Uneekor Eye XO 1/2 / Uneekor QED / Foresight GC3 / SkyTrack+ / FlightScope X3 / FlightScope Mevo / Trackman iO). This is the price range where most quality in home launch monitors fall. It’s important to understand what makes some of these ideal for home golf simulator environments. Photometric launch monitors like those from Uneekor, Foresight and the Skytrack+ are optimal for indoor use because they don’t require the ball to fly long distances as do their radar oriented counterparts.
- Budget launch monitors < $5,000 (SkyTrack / Uneekor Eye Mini / Garmin Approach / Rapsodo MLM2 Pro) are considered entry level launch monitors. Units at this price range can be used as range buddies or incorporated into a golf simulation environment. Some (but not all) monitors at this price range suffer from lack of accuracy and consistency that higher end launch monitors do not. That said, a cheap portable launch monitor can be a good entry into the golf simulation world.
Launch Monitor Types
- Radar Based Launch Monitors – (Trackman / Flightscope Mevo / Garmin R10)
- How it works – uses doppler radar to track flight. This is popular for outdoor use cases or commercial simulators where there is plenty of space to allow the radar to track ball flight.
- Pros – Can be incredibly accurate. Typically measure club data as well as ball data.
- Cons – needs too much space for most indoor golf simulator installations
- Camera Based (Photometric) Launch Monitors – (Uneekor / Foresight GC3 / Foresight GC Quad / Skytrack+ / Bushnell Launch Pro)
- How it works – High speed cameras capture ball spin and velocity by measuring
- Pros – This type of launch monitor works best in a home golf simulator environment because they require very little space. You often can see an image of your ball contact on a separate computer monitor.
- Cons – Some require marked balls. Some require certain lighting conditions to work properly.
- Hybrid Launch Monitors (Trackman 4 / Full Swing)
- How it works – Uses both radar and high speed cameras producing the most realistic and consistent golf simulator experience.
- Pros – The most accurate launch monitors available today.
- Cons – The most expensive launch monitors on the market. Unless you’re doing a high end home golf simulator install, these are not practical choices.
Hitting Mat / Stance Mat
The hitting mat and stance mat can be combined into one unit or they can be purchased separately. Obviously, they serve similar purposes but one you stand on and one you hit off. There’s two main focuses when considering your hitting and stance mats. One, is that you find surfaces that are level together. It would be a shame to practice all your shots with the ball and inch above or below your feet all the time. Two, depending on the amount of sim golf you intend to play, it can be crucial to find a hitting mat that both simulates real golf feels but also provides relief to your wrists on swings where you catch too much turf.
Get Smarter About Your Swing
Join thousands of golfers getting exclusive swing tips, club reviews, and gear guides straight to their inbox – before they hit the site.
Mat Recommendation:
Our personal recommendation would be the SIGPRO Softy from the Indoor Golf Shop. If you go this route, I would be wise to pair it with their SIGPRO Golf Mats so that the color and height both match. This is not the most cost effective route, but it is by far the most consistent, durable and realistic mat we’ve found. We’ve written a more detailed article surrounding this SIGPRO Softy which can be found here. A cheaper, also Swing Yard tested, hitting mat that comes in as a very close second would be the Bullseye 3D hitting strip. Another super durable and excellent option to consider.

Impact Screen
If you intend to cast an image of your golf simulator on a screen, you will need an impact screen. These differ from large projector screens because they are built to withstand thousands of golf balls. There are a few things to keep in mind when purchasing and installing an impact screen. Here are two places where you can source a quality impact screen – Indoor Golf Shop or Carls Golf
- Some screens are designed to absorb sound more effectively and others will have a larger impact sound.
- Quality – some screens are made with thicker and higher quality materials. This will allow them to last longer and absorb impact from higher ball speeds.
- Image quality – screens with higher weave density typically have better image quality.
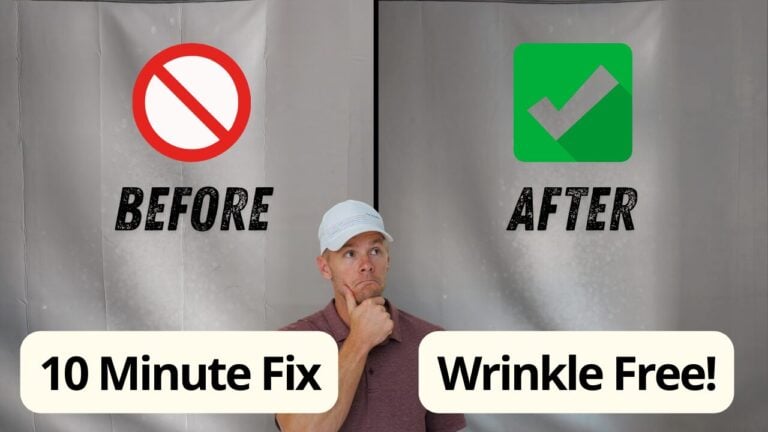
Make sure to get rid of the impact screen wrinkles when your impact screen arrives. Every single impact screen contains wrinkles and we’ve found the best way to get rid of them.
Projector
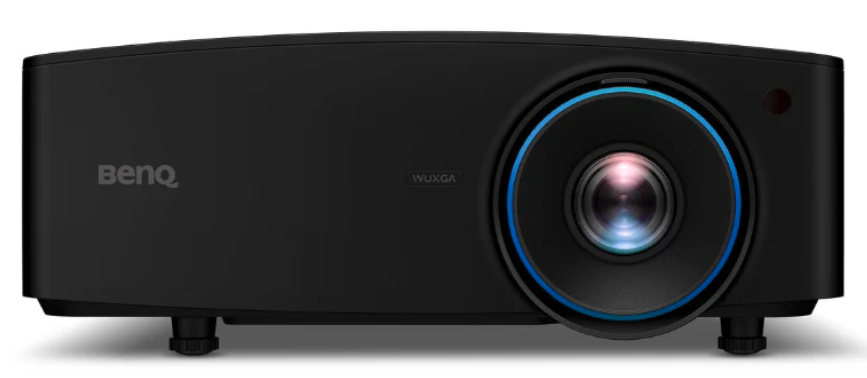
Most golf simulators use a projector to cast an image of the golf simulation software on to the impact screen. Like TV’s, projectors have many different features that are important to understand. A quality projector has the ability to cast a surprisingly realistic image onto your impact screen. Here are a few things to consider when buying a projector.
- Resolution – You have to decide whether you’re going to buy a 1080p or 4k projector. A 4k projector will cast sharper images on your screen and future proof your golf simulator investment. However, they are more expensive and require more expensive computers (video cards) to support that additional resolution without dropping frame rates during gameplay.
- Throw Ratio – This ultimately determines the distance your projector needs to be from your impact screen. Short throw projectors are popular in golf simulation environments because they can cast a wide angled image. This allows them to sit closer to the screen. Sometimes a traditional projector will need to be installed too far from the screen for home installations. Projector Central has a handy tool for calculating the throw ratio necessary for your simulation environment.
- Lumens (Brightness) – I typically say 3000 lumens is the minimum you want for a golf simulator. 4000+ lumens is excellent for rooms with unavoidable ambient light.
Projector Ideas
- BenQ LK936ST – Highest quality projector on the list. 4k resolution, 5100 lumens and short throw with optical zoom allowing for flexible positioning. Ideal for high end golf simulator environments with large screens or ambient light.
- BenQ Tk700STi – High quality alternative to the projector above. 4k resolution, 3000 lumen, short throw projector.
- LG ProBeam – A bright high quality option if you don’t want to splurge for the BenQ LK936. 4K resolution, and 5000 lumens for about $2000
- Optomo GT2000HDR – Still a high quality projector that is more budget friendly. 1080p resolution with 3500 lumen output
Computer
A golf simulator requires a quality computer to drive the graphics of more modern golf simulation software. That said, if you don’t desire to turn the graphics up too high (4K or high detail) you can get away with a cheaper machine. One thing I would recommend against, is using a machine with an on board graphics card. You will most likely not be satisfied with your simulator experience. Here are a couple things to keep in mind when buying a dedicated machine for your golf sim
- Video card – the quality of the graphics and your experience (detail and frame rate) will largely be driven by your video card. At the time of this writing Nvidia based cards in the 3000 and 4000 series would be ample for most simulation setups. This would include cards like the NVIDIA RTX 3090 or the NVIDIA RTX 4080 Super (which is a much better value than the 4090). If you are technically inclined, and want to look at GPU (graphic processing unit) benchmarks to optimize your price/performance ratio, you can refer to a site like this – Video Card Benchmarks.
- Processor – make sure you’re using one of the latest generation processors or some games will load very slowly.
- Entire PC – It’s probably easiest, if you have the budget, to buy a prebuilt gaming PC. This will not only have a quality video card, but will have a good enough processor and enough power in the power supply. I like some of the prebuilt or custom designed PC’s from Microcenter, but similar rigs can be purchased from Amazon, BestBuy or your local electronics retailer.
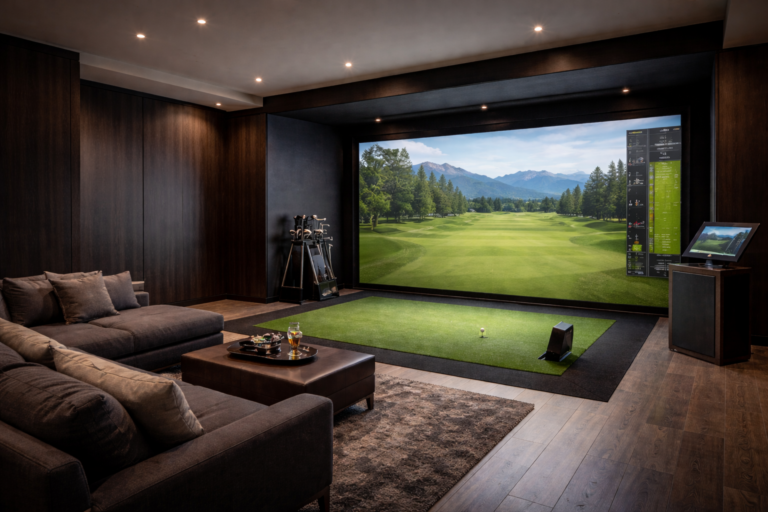
How Much Space and What Enclosure?
When evaluating whether your space can house a golf simulator the first requirement is having enough space. But what will allow me enough space to swing comfortably? Below is a list of minimum requirements in addition to dimensions that will yield a more optimal simulation environment.
Golf Simulator Room Dimensions
- Ceiling Height: We’d say the absolute minimum ceiling height for a golf simulator is 8.5 feet (2.6 meters), though 9 feet (2.7 meters) is safer and 10 feet (3 meters) is ideal. Taller golfers or those with upright swings may need more to avoid hitting the ceiling with a driver. I am 6’2″ and barely get away with a 9′ ceiling in an unfinished basement. My brother is 6’3″ and has a swing that’s slightly more upright than mine. He can’t swing a driver in my basement comfortably. Before committing the rest of your budget to buying simulation equipment, make sure you can swing all clubs comfortably.
- Width: 10 feet (3 meters). This allows a comfortable swing for right- or left-handed golfers. For setups accommodating both, 15 feet (4.5.7 meters) is better to center the hitting area and avoid wall contact.
- Depth/Length: 12 feet (3.7 meters), but 15-18 feet (4.6-5.5 meters) is ideal. Let’s break it down:
- 10-12 feet from the tee to the impact screen for ball flight and safety.
- 1 foot behind the screen to prevent wall damage.
- 5-7 feet behind the tee for a full backswing and follow-through.
- Some launch monitors (e.g., TrackMan, FlightScope Mevo+) need extra depth (up to 16-18 feet) for radar tracking.
Enclosure
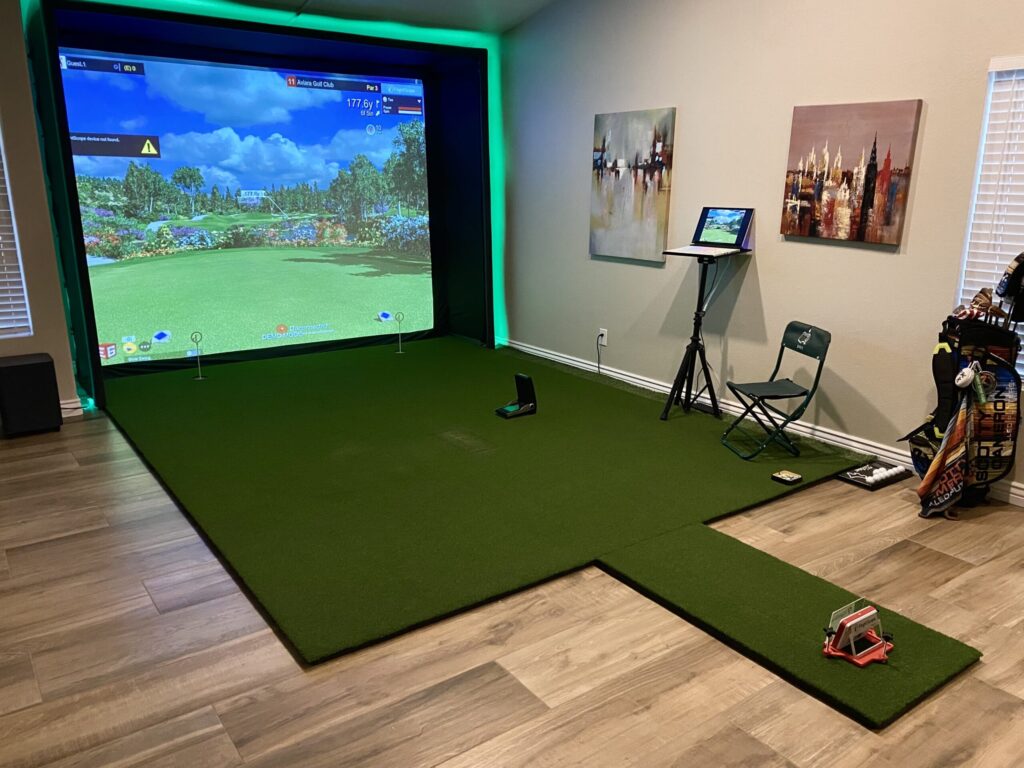
When choosing a golf simulator enclosure, whether building a DIY setup with collapsible panels or purchasing a fully assembled unit from a retailer like The Indoor Golf Shop, consider factors like space, budget, durability, and ease of setup. Here’s a summary of what to look for:
- Space Compatibility and Size: Ensure the enclosure fits your available space. DIY kits, like those from Carl’s Place, allow customization for specific room dimensions, while pre-assembled units, such as The Indoor Golf Shop’s SIG Enclosures, come in fixed sizes (e.g., SIG8, SIG10, SIG12). Measure your space and account for ceiling height and depth (2-5 feet for freestanding units).
- Material Quality and Durability: Look for high-quality impact screens that withstand high-speed shots (as mentioned above) and durable framing (e.g., 1-inch EMT pipes or powder-coated steel). DIY kits often require sourcing pipes locally, while pre-assembled units include robust frames. Check for features like padded panels or poly spacer screens for safety and longevity.
- Ease of Assembly and Portability: DIY enclosures with collapsible panels, such as Carl’s Place C-Series or AKON’s Freestanding Kits, offer easy assembly and disassembly for storage or relocation, ideal for multi-use spaces. Fully assembled units from The Indoor Golf Shop, like the SIGPRO, require minimal setup but are less portable.
- Cost and Customization: DIY kits range from $999.95-$1,999.99, requiring additional materials like pipes, making them budget-friendly but labor-intensive. Fully assembled units from The Indoor Golf Shop start around $3,000, offering premium finishes and ready-to-use setups. Custom sizes are available for both.
Golf Simulation Software
When selecting golf simulator software for your home setup, the choice depends on compatibility, realism, course selection, and practice features desired. Below is a short review comparing Trackman (TPS/VG3), GSPro, Foresight Sports (FSX 2020/FSX Play), and Uneekor (View/Refine/Refine+) software.
Trackman (TPS/VG3):
- Pros: Industry-standard for accuracy, trusted by pros like Rory McIlroy. Trackman Performance Studio (TPS) and Virtual Golf 3 (VG3) offer stunning visuals, advanced analytics (e.g., shot comparison, bag mapping, impact video), and over 200 virtual courses. Ideal for game improvement with AI-driven shot analysis and practice modes like shot dispersion and skills tests.
- Cons: High cost (thousands annually for subscriptions). Limited third-party software compatibility (e.g., no official GSPro support). Requires Trackman 4 or iO, making it pricier for home setups.
- Best For: Serious golfers prioritizing analytics and premium graphics over course variety. Works well in any enclosure but shines in larger spaces due to radar-based tech.
GSPro:
- Pros: Affordable at $250/year, with ultra-realistic 4K graphics and ball physics built on the Unity engine. Over 1,000 community-created courses (e.g., Augusta, Pebble Beach) via Open Platform Course Designer (OPCD). Compatible with Uneekor, Foresight, FlightScope, and others (e.g., SkyTrak via community interfaces). Supports multiplayer modes (up to 8 players) and Simulator Golf Tour (SGT) for online play.
- Cons: Lacks advanced practice analytics compared to FSX Pro or TPS. Some launch monitors (e.g., SkyTrak, Garmin R10) require unofficial interfaces, and Trackman integration is unreliable. PC-only, requiring decent specs (GTX 1070 or better).
- Best For: Budget-conscious golfers seeking immersive course play and community engagement, ideal for both DIY and pre-assembled enclosures.
Foresight Sports (FSX 2020/FSX Play):
- Pros: Highly accurate with GC3, GCQuad, or GCHawk. FSX Play offers realistic graphics comparable to GSPro, with FSX Pro providing detailed swing analytics (e.g., dispersion, club data). Bundled with 10-25 courses, with third-party integrations like GSPro, E6 Connect, and Awesome Golf. Ceiling-mounted GCHawk suits compact enclosures.
- Cons: Requires FSX 2020/Play license for third-party software like GSPro, increasing costs. Limited putting analysis on GCHawk compared to GCQuad. Higher-end hardware can push budgets beyond DIY setups.
- Best For: Golfers balancing realism and analytics, suitable for both DIY collapsible and pre-assembled enclosures like SIG10.
Uneekor (View/Refine/Refine+):
- Pros: Tailored for Uneekor QED, EYE XO, and EYE XO2, with seamless integration. Refine offers 5-20 courses, practice modes, and quirky mini-games for family use. Compatible with GSPro, E6 Connect, and TGC 2019 for expanded course options. Overhead EYE XO2 is space-efficient for DIY or pre-assembled setups. Affordable compared to Trackman.
- Cons: Exclusive to Uneekor launch monitors, limiting versatility. Less course variety in-house compared to GSPro. Club stickers may be needed for full data, which some find inconvenient.
- Best For: Home users wanting cost-effective, versatile software with strong compatibility, ideal for compact enclosures.
Miscellaneous Add-Ons
The final piece of your golf simulator project is to ensure you have the proper finishings for what your space and golfers need. This can include any list of items depending on your space and setup, but let’s list out a few of the things that we’ve found useful in our own experiences.
Watch
New videos every week on our youtube channel
- Balls – This can largely depend on what launch monitor you have. Many launch monitors allow you to hit whatever kind of ball you want (ProV1, TP5, Srixon, etc…), however some simulators, like the Uneekor QED, require marked balls, so that’s something to take into consideration depending on your launch monitor’s needs.
- PRO TIPS:
- Do not use dirty golf balls – Keep that pretty impact screen white and clean!
- Do not use golf balls that have scuff marks – this will start to cause slow tears in your screen as a result of the unsmooth ball spinning against the threads.
- Do not use golf balls that have marker on them – the marker will also wear off onto your screen over time, permanent or not.
- PRO TIPS:
- Tees
- Basic sim tees that will work on any hitting mat
- Tee options for hitting mats that allow you a hole for the tee
- K2 Golf Tees (Premier Option) – my personal favorite and what I use in my simulator
- Overhead Lighting
- Great option, with a remote, for a cheap price
- Club Storage – we wrote an article about this. Definitely useful if you’re tight on space!
- Mini Refrigerator – because what man cave isn’t complete without one?
- Decor – The final piece, you’re almost there!
This post includes affiliate links. I do earn a commission for products purchased using these links (at no additional cost to you). Thank you for supporting Swing Yard, making the content you see on this blog possible.
Frequently Asked Questions (FAQ)
A home golf simulator can cost anywhere from $800 for a basic DIY setup to over $15,000 for a high-end system, depending on the launch monitor, screen, projector, and software you choose.
The cheapest method is to use an affordable launch monitor like the Rapsodo MLM2PRO or Garmin R10, pair it with a pop-up net, and connect it to a tablet or laptop running budget-friendly software.
Most setups need at least 10 feet of width, 10 feet of height, and 15 feet of depth for comfortable swinging and accurate tracking.
Budget options are getting better and better. However, the higher end options will be more accurate and won’t have as many misses, or misreads, than the cheaper launch monitors.
Yes, assuming your setup and space allows for it. It can also be made easier by using an overhead launch monitor as opposed to a floor standing launch monitor.
The high end launch monitors closely mimic on-course ball flight and conditions, as a result, they can be effective training tools to improve your game.
GSPro is our pick. The physics engine is what separates it from E6 Connect for most home simulator setups — ball flight, shot shape, and the way the ball reacts on and around greens all feel noticeably more true to real golf. Beyond the gameplay itself, GSPro has built a genuinely strong community around it with course designers constantly adding new layouts, active online competitions, and a user base that takes the experience seriously. E6 Connect is a solid option and works well with a wider range of launch monitors out of the box, but if you are choosing between the two for a home setup and want the most realistic round of golf you can get indoors, GSPro is the one we keep coming back to.

Leave a Comment